
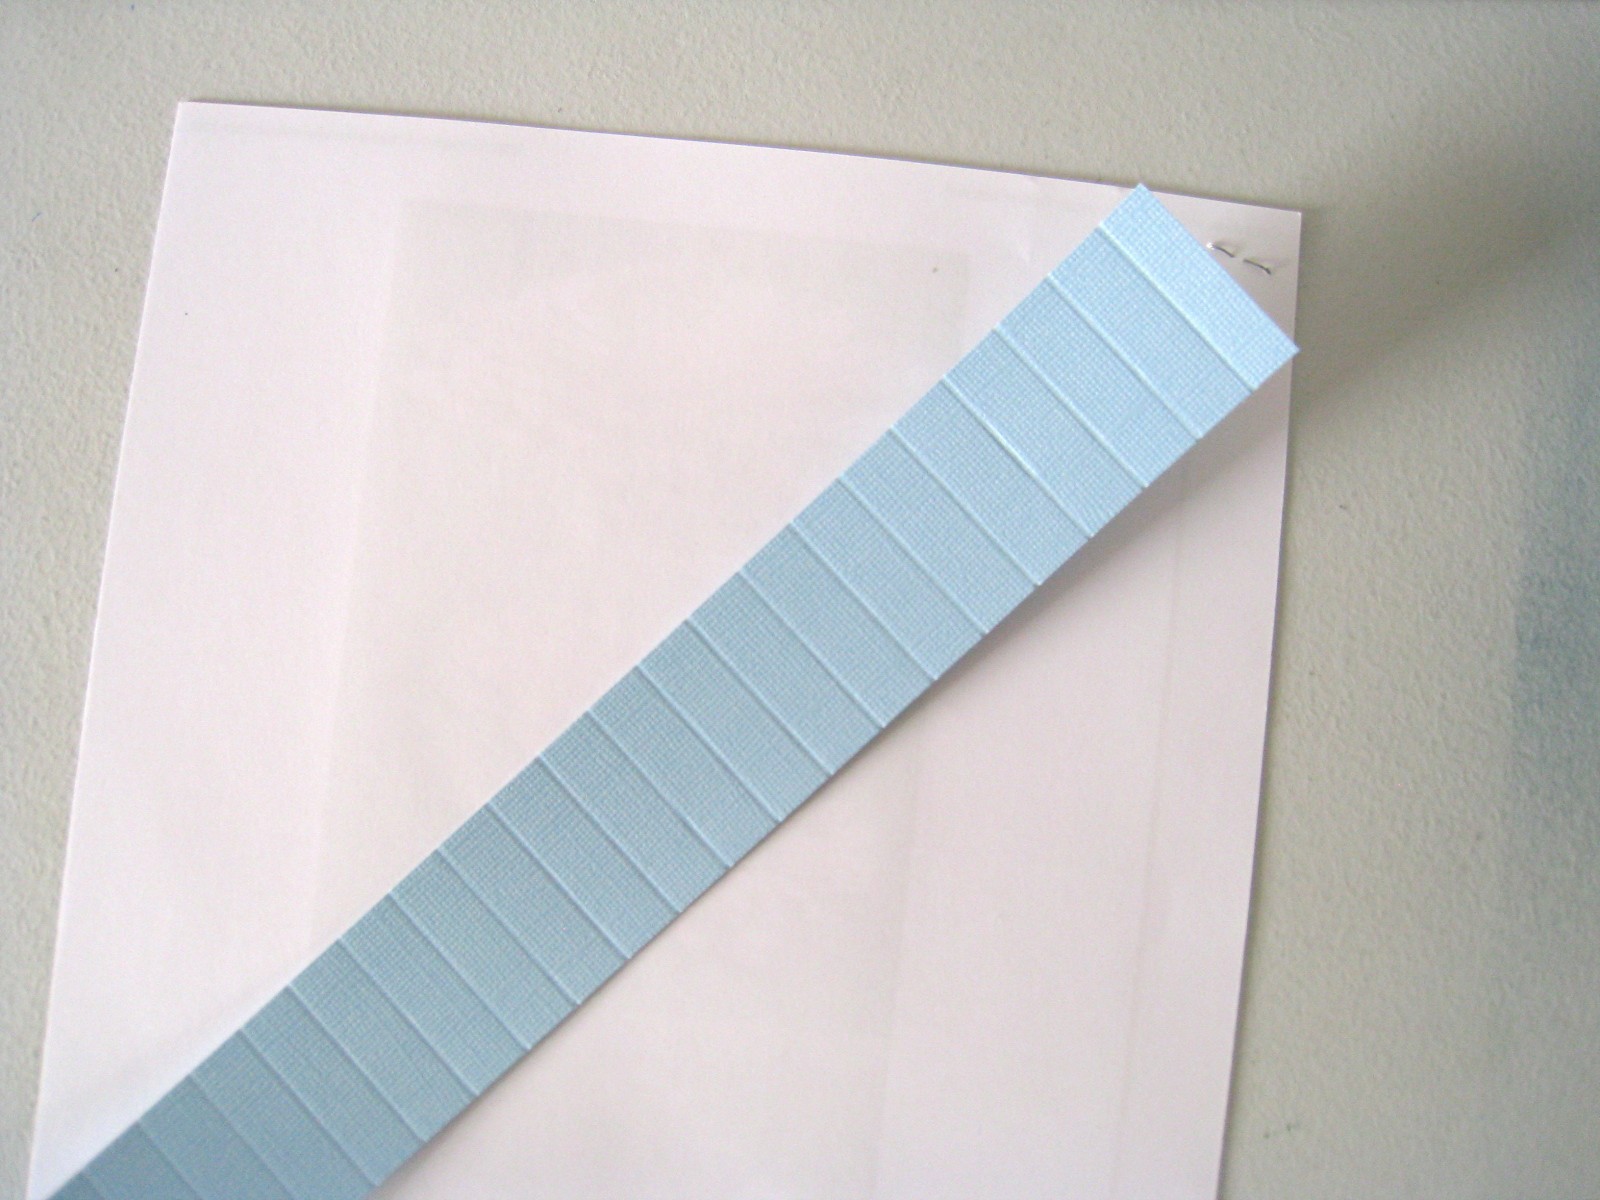
I scored every 1/2 inch and then folded it accordian style.

When I opened it up, I used red tape and put the two ends together. I made sure I had a hill on one side and a valley on the other. That way when I put them together no seam showed.

From this shape you push in the top until it lays flat. (For those who haven't made any of these, you'll understand once you start to do it. I can't explain it very well lol)

That's all there is to making these! I made a few of them in different sizes, but only took pictures doing the blue one.
For this card, I used a 3/4 inch strip of green and white patterned paper. (I didn't take a picture of that one either, sorry. I made several flowers while teaching myself how to do this and I didn't take pictures of everything.)

I cut the bird and all it's layers at 3 1/4 inches from the Florals Embellished cartridge on page 63. The stem is from Walk in My Garden, but it was something I had cut week ago and I don't remember the size. I used my white gel pen to the neck and tail area, a sticker and stickles, of course!


Thanks for looking!


Lovely card! I really want to get that cartridge too! Beautiful cuts and your rosette turned out great!
ReplyDeleteJan
What a beautiful card! I haven't tried these flowers yet, but you made it look pretty easy.. I just might give it a try!
ReplyDeleteLori
What a BEAUTIFUL CARD! I LOVE the rosette for the flower and the butterfly on top.... lovely! Theresa
ReplyDeleteYou made that looks so easy! I think those flowers are so cute and glad to know how to make them. Thanks. I like the card, beautiful!
ReplyDelete