
For my DT post over at The Bugbytes this week, I decided to use the Circle exclusive cartridge, Sophie. It's a great cartridge that I haven't used nearly enough!
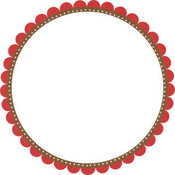
I cut out the butterfly, using the doily feature to get the wreath and the butterflies from the base and base/shift feature. The doily was cut @ 11. For each butterfly I used Design Studio and and sized them to fit where I wanted them.


I didn't want to use chipboard, so I used my DCWV Shimmers paper, which is fairly strong paper.

I typed up my saying on my PC and printed it out. I used the hinge method to make sure it was even when cutting out the circle.
The hinge method is simple to use. I took a standard 8.5 X 11 printer paper and put it on my mat and cut out a circle from George @ 6.70 using my Gypsy.

Leaving my mat IN the machine, I used the "load paper" button, I removed the circle.

I placed a piece of tape on the top of my paper to keep it's placement. I then put my printed page under the paper on my mat to get it exactly where I wanted it. Once I made sure it was securely stuck to my mat, I removed the 1st page. I cut the circle again... never removing the mat... and it came out perfectly.

I ran all my butterflies through my xyron machine and started attaching them on my wreath. I lost a few butterflies to Sassy's feet, she couldn't resist playing with them! Once I finally had all the butterflies attached, I added the circle to the center and then I added some stickles to some of the butterflies and let it dry.

While the pictures didn't turn out well, it's gloomy outside today, I was happy with how the wreath turned out!
Thanks for looking!


This turned out lovely. I am partial to butterflies myself.And glittering your embossed colorful butterfliesare so lovely. TFS
ReplyDelete